Wavy Border: A Smart Embroidery Choice for Small Business Branding
First Impression: Friendly, Fluid, and Professionally Versatile
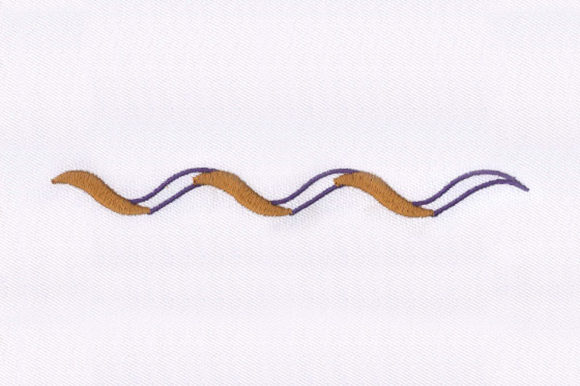
As an embroidery designer who’s developed hundreds of machine embroidery designs for small business clients—from neighborhood bakeries to indie florists—I immediately recognized Wavy Border’s quiet confidence. Its name alone signals motion and organic flow, not rigidity or over-engineering. This isn’t a stiff monogram or a hyper-detailed floral motif—it’s an Outline Flowers-category machine embroidery design built for rhythm, not realism. That makes it ideal for brands that want warmth without clutter: think handmade soap labels, café aprons, pet boutique tote bags, or studio caps. It reads as modern yet approachable, elegant but never fussy—exactly the tone small businesses need to signal care, craft, and consistency.
Where Wavy Border Shines in Real Business Use
Wavy Border works exceptionally well as a flexible branding element—not just decoration. I’ve used similar wave-outline motifs on embroidered patches for local coffee roasters (sewn onto sleeve cuffs), as subtle chest accents on staff uniforms at a botanical gift shop, and as a clean border around custom logos on cotton tote bags sold at farmers’ markets. Its strength lies in adaptability:
- Embroidered patch applications: Works beautifully at 2–3" sizes when stitched with balanced thread tension—ideal for iron-on or sew-on patches on denim jackets, canvas aprons, or merch bundles.
- Cap embroidery: The open outline structure avoids crowding the front curve; pair it with a simple wordmark inside the wave for instant recognition.
- Tote bag & apron design: Scales cleanly across broad fabric surfaces without visual weight—perfect for boutique merchandise where subtlety reinforces premium perception.
- Product packaging accents: Stitched onto kraft paper tags or linen drawstring bags, it elevates handmade product presentation without competing with core branding.
- Commercial embroidery projects: As a digital embroidery file supporting 15 formats—including PES, DST, JEF, VP3, and HUS—it integrates smoothly into most production workflows, whether you’re running a solo Etsy shop or managing a multi-station embroidery shop.
Use With Intention: Where Caution Keeps Your Brand Sharp
While Wavy Border is highly adaptable, its outline nature means context matters. On dark uniforms or textured fabrics like heavy twill or corduroy, test stitch density and thread color contrast first—thin outlines can disappear if thread blends too closely with fabric. Avoid shrinking it below 1.5" for cap fronts or tiny product labels unless you’ve verified legibility at that scale. Also, be mindful on curved surfaces (like baseball caps or rounded mugs with heat-transfer patches): the wave’s natural rhythm may distort if hooping isn’t precise or stabilizer isn’t matched to fabric stretch. And while it’s labeled as an Embroidery design—not a dense fill—it still benefits from reviewing actual stitch paths before bulk runs. Don’t assume “outline” means low stitch count; some wave treatments add subtle underlay or contouring that affects wash durability.
How Wavy Border Strengthens Brand Identity—Beyond Aesthetics
Small business owners often underestimate how much a single, well-chosen machine embroidery design contributes to perceived professionalism. Wavy Border subtly communicates intentionality: it’s not generic clip art—it’s crafted rhythm. When repeated across staff aprons, customer tote bags, and event merch, it builds visual consistency that customers begin to associate with your brand’s personality—whether that’s a florist’s gentle elegance or a craft studio’s joyful energy. That repetition builds trust: shoppers recognize your stitching before they read your logo. It also lifts perceived value. A plain cotton tote becomes a branded keepsake when finished with a clean, confident wave. For Etsy sellers and handmade brands, this kind of detail tells buyers you invest in quality execution—not just product design.
Practical Designer Notes Before You Stitch
Before committing Wavy Border to your next client project or shop inventory, run these checks:
- Test in black and white first. Outline designs rely heavily on contrast—verify visibility across fabric colors before selecting thread.
- Check minimum viable size. Resize the digital embroidery file to your target patch or cap dimensions and inspect spacing between wave peaks—tight curves shouldn’t collapse into stitching noise.
- Review thread color strategy. A single-tone wave (e.g., navy on cream) feels cohesive; multiple colors introduce complexity better suited for larger applications.
- Confirm hoop size compatibility. While not specified in the description, verify the design fits your standard hoops—especially for cap or sleeve work where space is constrained.
- Test on real fabric + stabilizer. Run a sample on your most common substrate (e.g., duck canvas for aprons, twill for caps) using your go-to cutaway or tear-away stabilizer.
- Create a printable mockup. Show clients how Wavy Border integrates with their existing design assets—logo placement, font pairing, layout balance—before stitching begins.
- Verify commercial licensing. Since this is intended for small business merch, custom apparel, and resale items, ensure your purchase includes rights for commercial embroidery use.
Final Thought: A Border That Builds Belonging
Wavy Border isn’t just decorative framing—it’s a quiet connector. Whether it wraps a bakery’s logo on a linen apron or traces the edge of a pet brand’s embroidered patch, it says, *“This belongs together.”* For small business owners and embroidery professionals alike, that sense of cohesion—between product, person, and place—is where real brand identity takes root. Choose it thoughtfully, test it thoroughly, and let its fluid confidence do the work.